Sponsored By: AE Studio
This essay is brought to you by AE Studio, your custom software development, and AI Partner. Built for founders, AE helps you achieve rapid success with custom MVPs, drive innovation, and maximize ROI.
If you have to regularly generate images using an AI-powered tool like Midjourney, you’re probably familiar with the challenges. Perhaps you ask it for an illustration of people at work, and it serves up solely Mad Men-era shots overladen with testosterone. Maybe you tell it to make you a bouquet without roses, and it gives you a flower quadrant worthy of Beauty and the Beast. During one particularly funny week at Every, we discovered that Midjourney’s ultimate Achilles heel was “person dreaming of piggybank.” The AI could not wrap its “head” around that concept, regardless of what details we fed it. (The results were nightmare fuel.)
I’ve spent a lot of time experimenting with Midjourney’s capabilities in recent months—I come from an advertising design background, so I’m particularly motivated to master the new medium. I waded through Midjourney’s detailed technical documentation, followed smart creators tweeting Midjourney tips, and stalked public channels in Midjourney’s Discord.
I learned that there are nearly infinite possibilities for directing Midjourney’s output. It’s incredibly powerful and adaptable, and you can exert much more control over the results than you’d think from just looking at Midjourney’s UI. It’s not an intuitive interface though—it takes research and practice to make full use of Midjourney’s command language (much like mastering keyboard shortcuts in your favorite apps).
At Every, we rely on Midjourney to generate our article images, so I pulled together a guide for our internal use. When we realized it might be a helpful resource for others, we decided to publish it for our subscribers.
In this article, I’ll walk you through the most powerful and useful techniques I’ve come across. We’ll cover:
- Getting started in Midjourney
- Understanding Midjourney’s quirks with interpreting prompts
- Customizing Midjourney’s image outputs after the fact
- Experimenting with a range of styles and content
- Uploading and combining images to make new ones via image injections
- Brainstorming art options with parameters like “chaos” and “weird”
- Finalizing your Midjourney output’s aspect ratio
And much more.
Getting started (for beginners)
The most challenging part about using Midjourney is that there’s no official web app yet, and the whole front-end user experience happens through Discord. So the order of operations to get set up is a little convoluted, and you have to create your Midjourney images through Discord chatrooms (channels).
If you already have some basic familiarity with Midjourney and its UI, you may want to jump ahead to the “Promptwork” section. If you’re a beginner, follow Midjourney’s quick start instructions to get set up. Before you move on in this guide, just make sure:
- You’ve created a Discord account
- You’ve subscribed to Midjourney (there is no free trial anymore unfortunately)
- You’ve joined Midjourney’s Discord server
- You’ve joined a “newbies” channel in Midjourney’s Discord server
In whatever newbie channel you choose to join, you will see thousands of other people submitting prompts, and the images Midjourney generates for them. I learned a lot in the beginning just from studying other people’s approaches.
Private Midjourney access
If your company or community has its own Discord server, then you can add a Midjourney bot for internal use. That way, you can generate images without working in a cluttered, public newbies channel, and you can more easily peruse the images generated by your co-workers or direct community. (Note: Midjourney still reserves the right to serve up your images in other places, like their showcase page.) You can also enable Direct Messages with a Midjourney bot if you prefer to work privately (so only you can see them).
So, now that you’re all set up, how do you use Midjourney?
The magic happens with /imagine
To interact with Midjourney you must first type a Command in whatever Discord newbies channel you’ve joined. A Command refers to the action that you want Midjourney to perform. The most common one is /imagine followed by your text prompt telling Midjourney what kind of image to create.
/imagine <your text prompt>
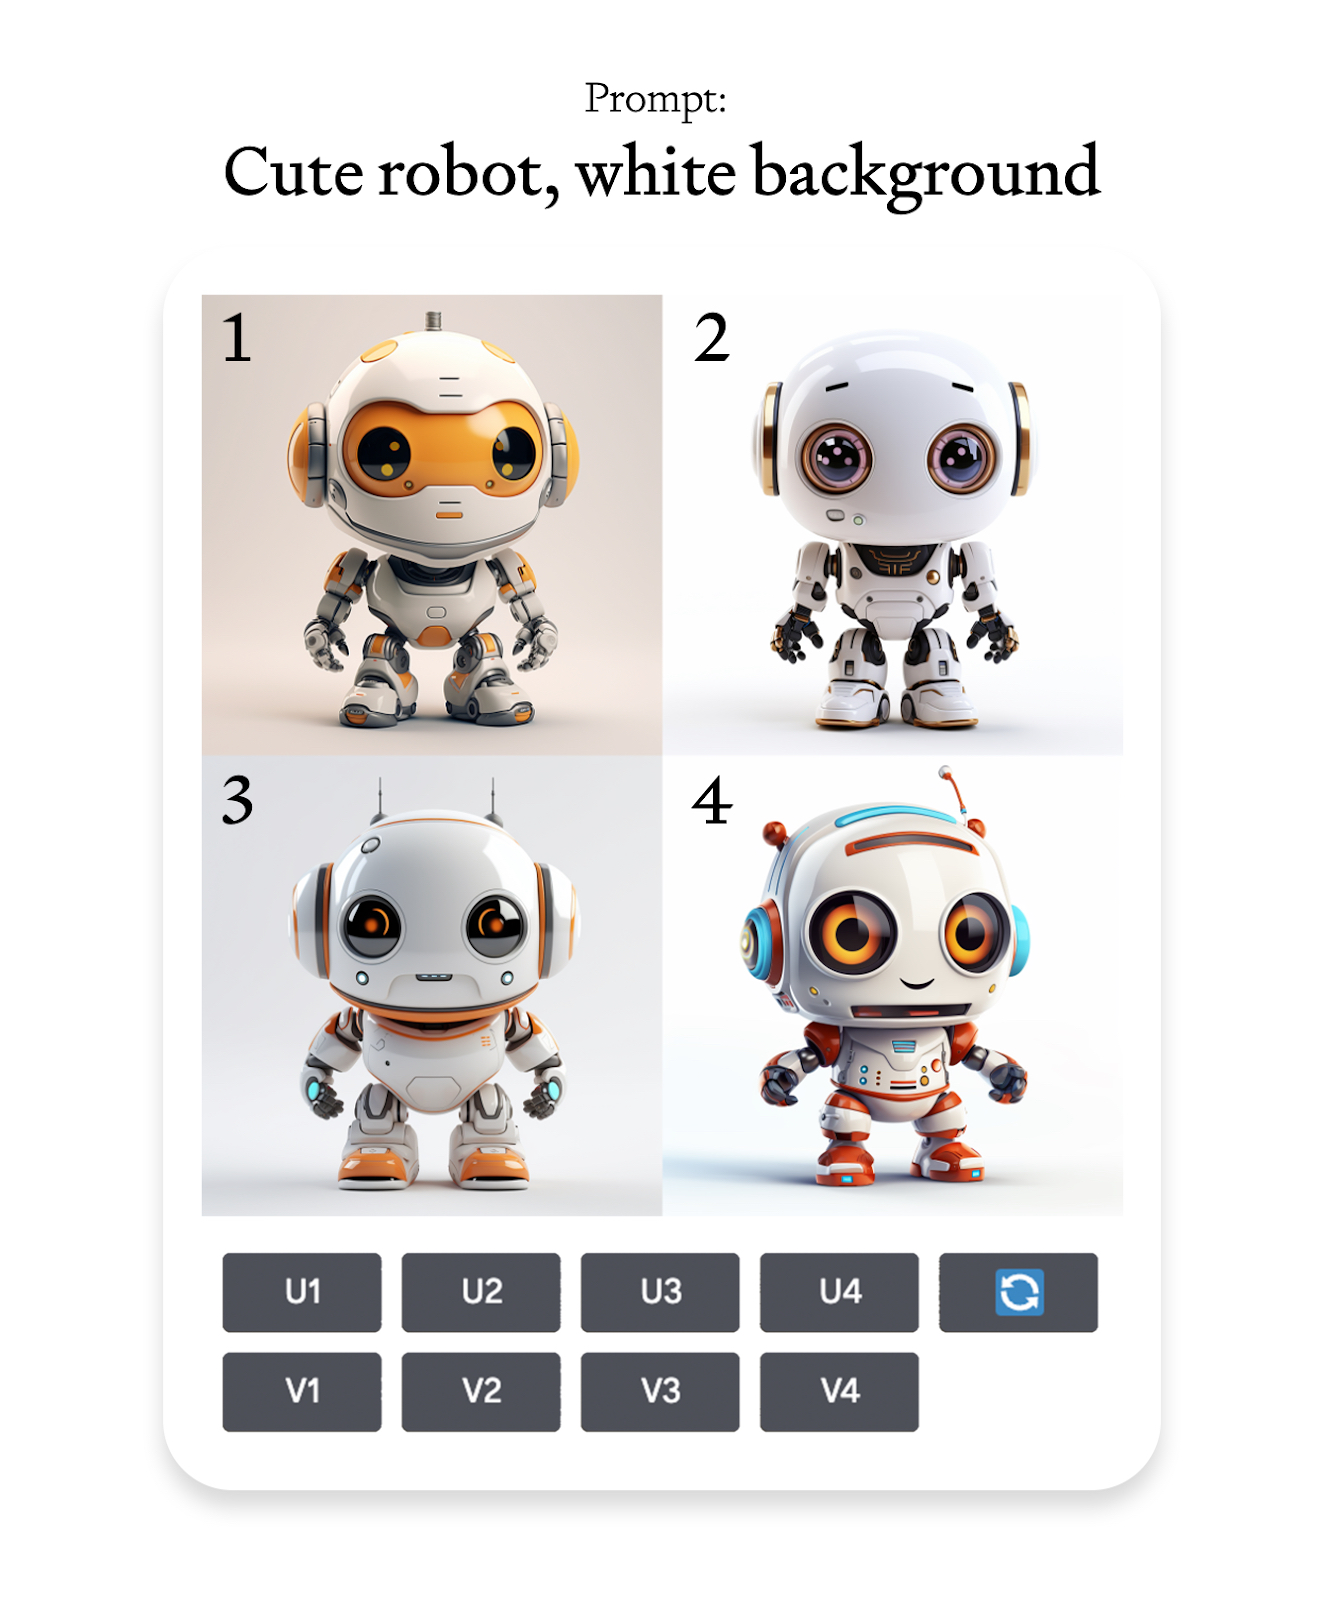
You can be as specific or as vague as you want in your prompt. Then hit enter to see what the model cooks up. In less than a minute you should see a grid of 4 images that Midjourney sent back to you. Here’s an example you can try:
/imagine cute robot, white background
After getting the grid output you will see a few options beneath it.
- U → Upscale: Selects one of the four and makes it big / improves its resolution so you can use it.
- V → Variate: Generates variations from the selected output
- 🔄 → Rerun: Use this option if you you like to rerun the same prompt again and see more results
The options apply in a clockwise direction. So if you really like the top right image (2), then you would click U2. and get the upscaled version almost instantly. To download the upscaled image: click on it to open it to full size, and then right-click and choose save image.
Congratulations, now you know how to use Midjourney like 95% of its users. If you want to learn what the other 5% knows, keep reading.
So you generated an image, now what?
After an image is upscaled you are presented with a few options.
Variation:
The first row of buttons allows you to regenerate new options that can vary subtly or strongly from the original depending on what you are looking for. It’s an easy way to riff and brainstorm.
Zoom out:
The middle row of buttons allows you to zoom out from your output and generate additional visual context surrounding it. In other words, Midjourney will add more of the “background scene” behind the main subject in your image.
Panning:
The last row of buttons lets you expand your image as implied by the buttons, left, right, up and down. It generates more of the scene in a specific direction (the same way panning your camera would in the real world). This also gives your images new aspect ratios.
Promptwork: Where the magic happens
I usually recommend starting with a simple prompt so you understand how Midjourney interprets the concept. Your prompt can be a sentence, a word, a letter, or even just an emoji.
The fewer words you include, the more influence every word has on the output. It gives the language descending priority—so if you write a whole paragraph, the words and phrases at the start of the prompt will shape the output the most.
You don’t need to include explicit instructions like “make me an image” or “create an illustration.” Instead, get right to the point of describing the visual you want. For example:
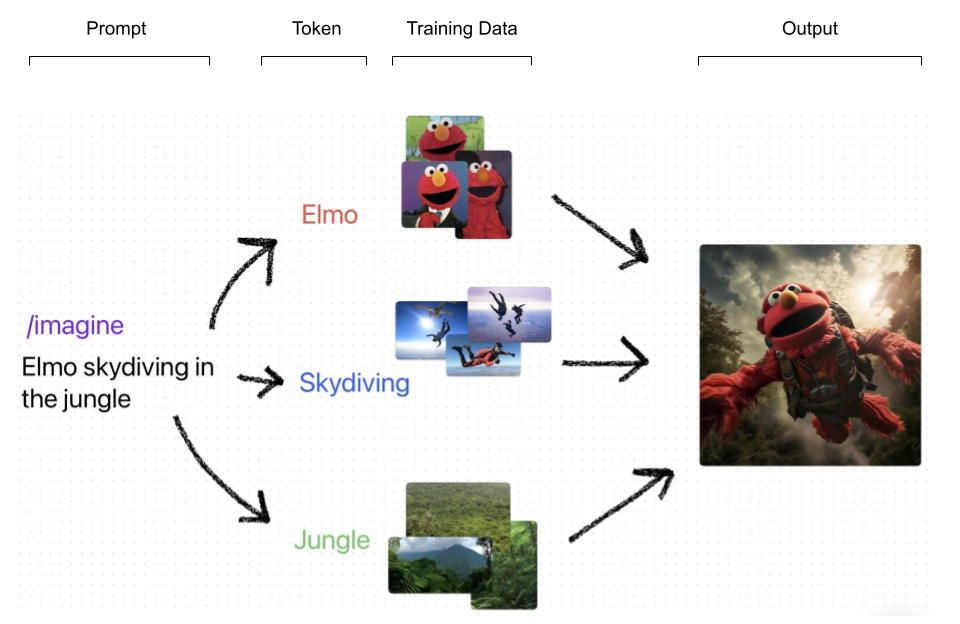
The model then grabs each “token” you write (i.e., Elmo, skydiving, jungle) and compares them to its training data to generate the desired image.
Less specific prompts are great for experimenting and gathering unexpected results—it’s fun to see how the mysterious black box of AI interprets a prompt like “heartache” or “sustenance.”
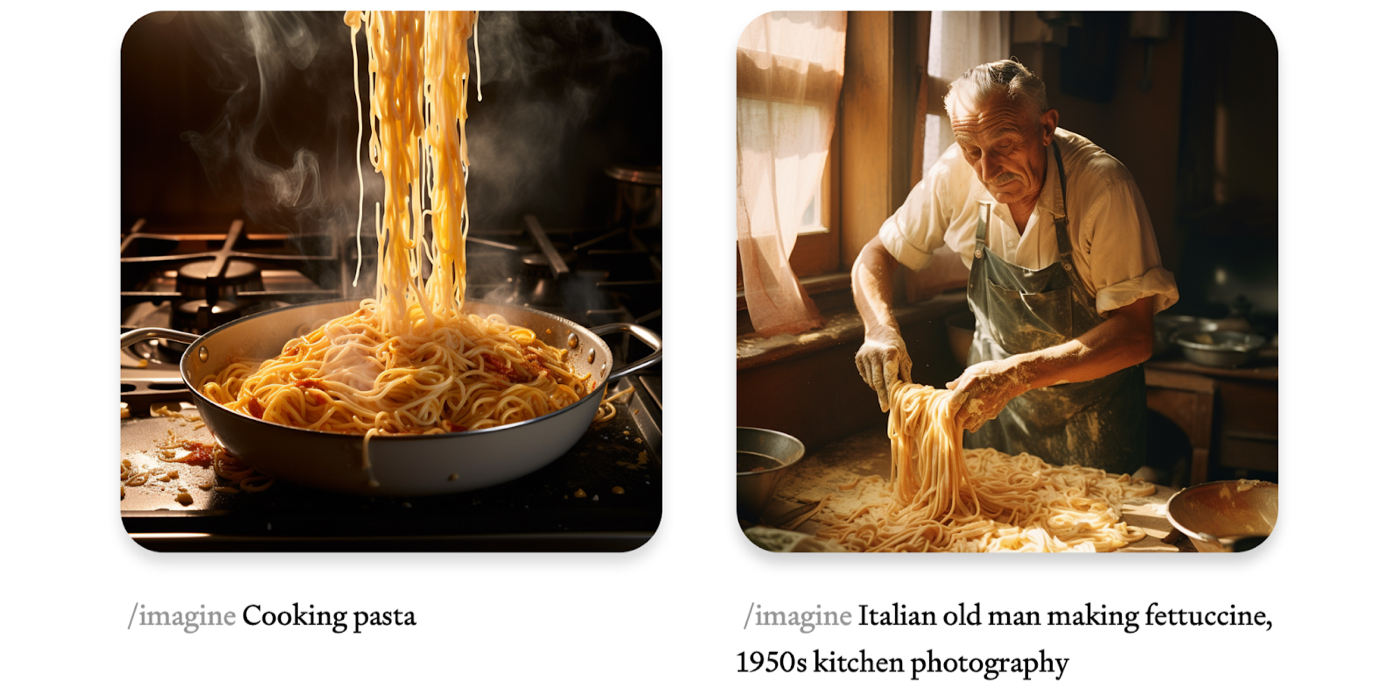
More detailed prompts give you greater control over the end product. “Cooking pasta” will differ dramatically from “old Italian man making fettuccine, 1950s kitchen photography.” I usually take the “design squiggle” approach to image generation, coming up with a bunch of options via simple prompts in the beginning, then honing in on a particular approach by adding more detail.
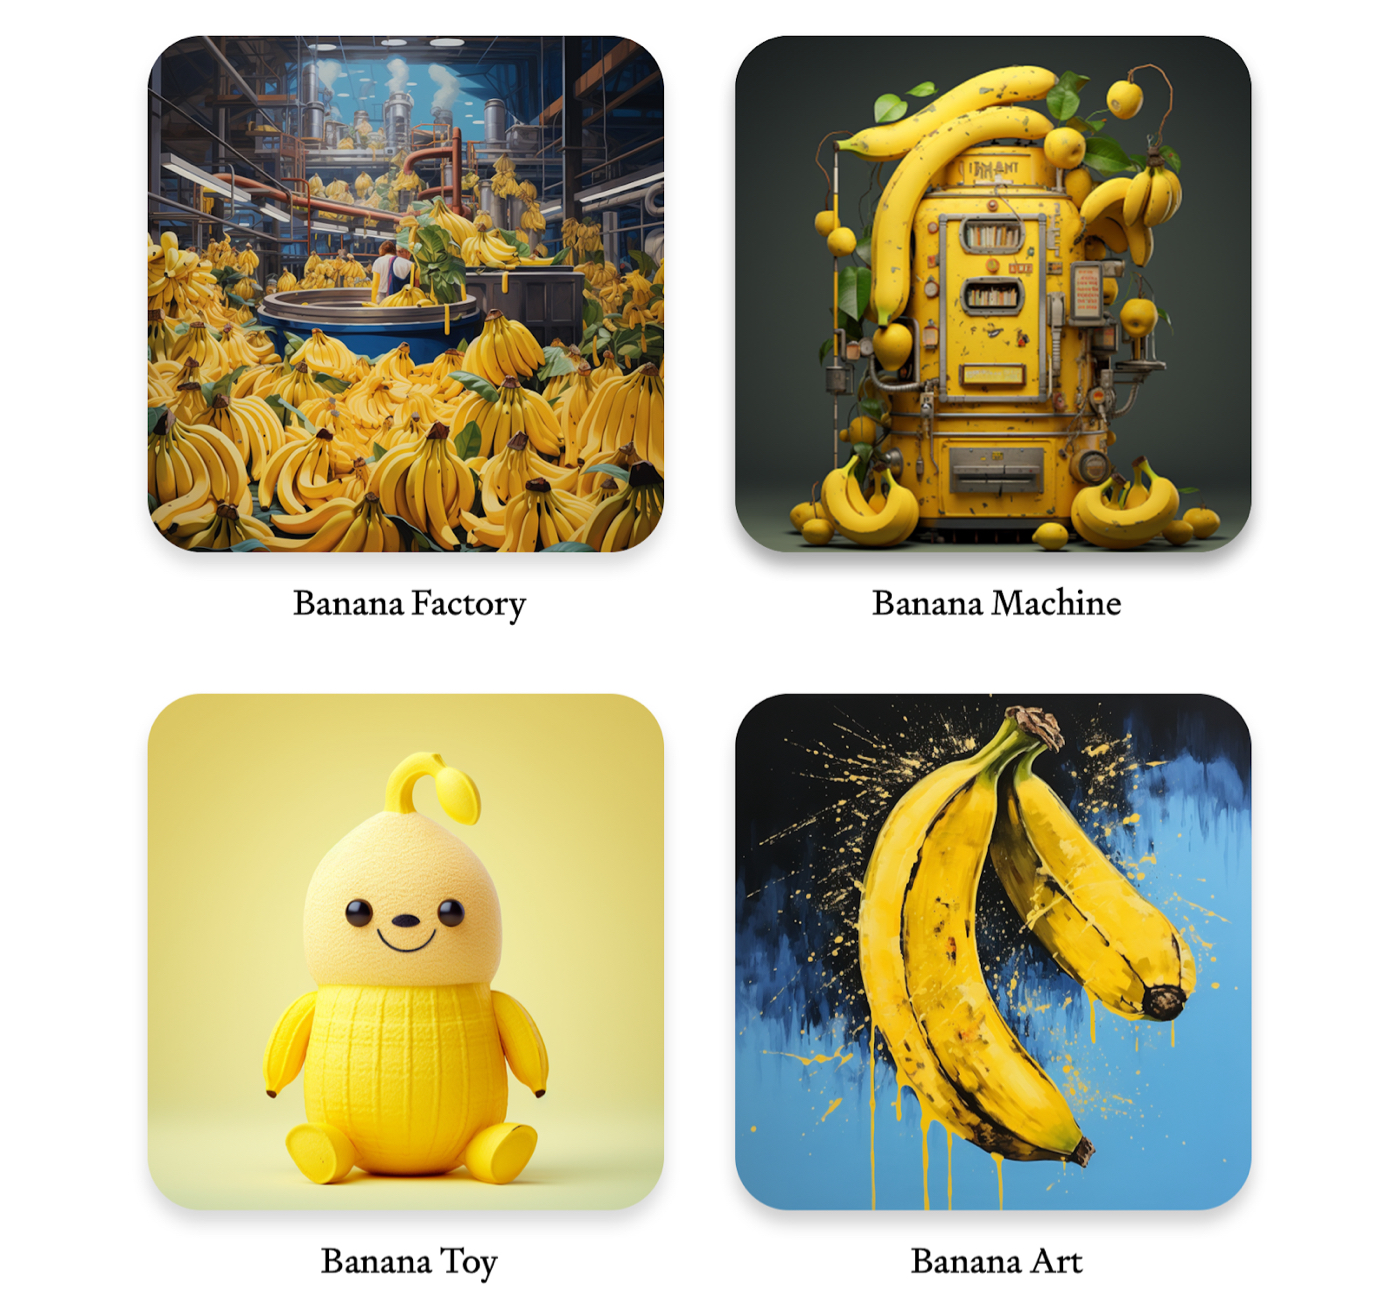
Changing just one token in the prompt can reshape the image dramatically. Case in point: Banana Factory, Banana Machine, Banana Toy, and Banana Art.
Gettin’ picky with it (the prompts, that is)
You can experiment with a range of aesthetic and content variables to generate different kinds of images. Just remember that the more concepts you include, the more data that Midjourney has to consider when generating an output.
Some options:
- Subject: person, animal, character, location, object, etc.
- Medium: photograph, painting, illustration, sculpture, cartoon, doodle, tapestry, watercolor, 3D render, etc.
- Environment: indoors, outdoors, on the moon, in Narnia, underwater, the Emerald City, etc.
- Lighting: soft, ambient, overcast, neon, studio lights, warm, etc
- Color: vibrant, desaturated, muted, bright, monochromatic, colorful, black and white, pastel, etc.
- Atmosphere: foggy, sunny, misty, cold, dirty, etc.
- Mood: sedate, calm, dramatic, raucous, minimalist, energetic, etc.
- Composition: portrait, macro, scan, headshot, closeup, birds-eye view, etc.
- Style: Wes Anderson, minimalist, Van Gogh, Anime, Solarpunk, gothic, graffiti, medieval, etc..
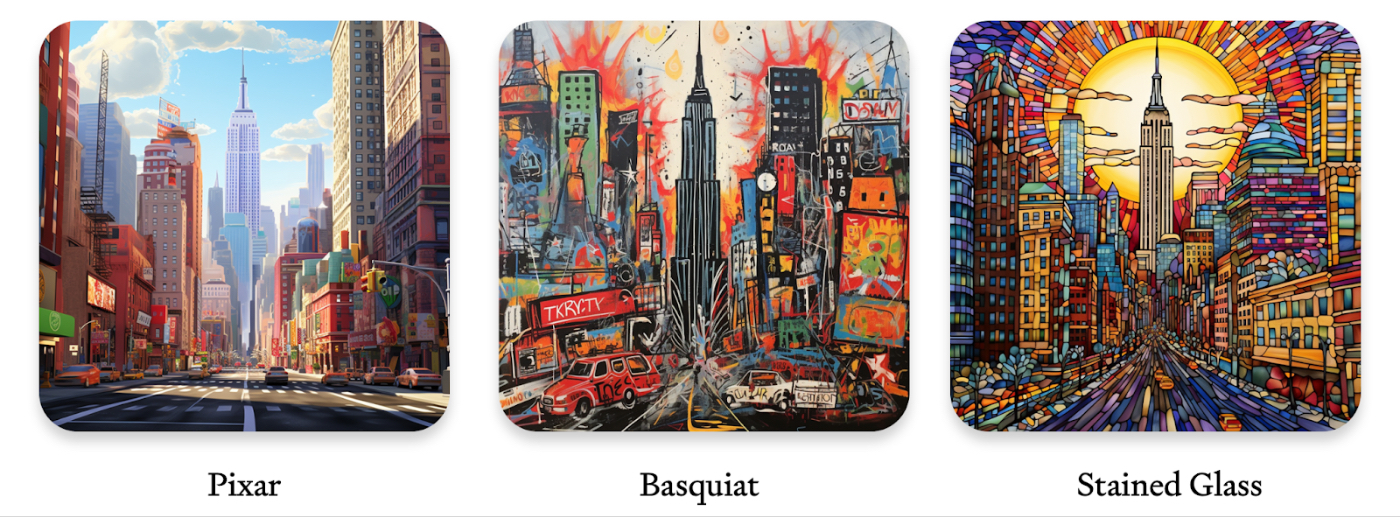
To play with the look and feel of an image, add the phrase “in the style of” to your prompt, like “NYC in the style of stained glass” or “banana toy in the style of Andy Warhol.” The options are endless—you can channel styles of painting, cinematography, periods in history, and more. For inspiration check out this extensive list made by Metaroids.
Caption: Midjourney outputs for the prompt “NYC in the style of Pixar / Basquiat / stained glass.”
A common mistake: Midjourney doesn’t understand ‘no’
Midjourney isn’t always the most intuitive user experience. In some cases it understands natural language and can interpret your prompts the way a human would. In other situations, it’ll do the exact opposite of what you expect. As a result, you sometimes have to add technical instructions (called parameters) to your Midjourney prompt to receive the results you want.
For example, Midjourney can get confused if you tell it not to do something. Unlike Google or ChatGPT, it takes every token into account when generating its outputs. If you want to generate a flower arrangement without roses, you should NOT write:
/imagine flower arrangement without roses
Midjourney will see the token “roses” and likely deliver them. In order to solve this, Midjourney developed the no parameter:
--no
You can add this parameter followed by the tokens you would like Midjourney to try to avoid including in your output. So:
/imagine flower arrangement --no roses
Sponsored By: AE Studio
This essay is brought to you by AE Studio, your custom software development, and AI Partner. Built for founders, AE helps you achieve rapid success with custom MVPs, drive innovation, and maximize ROI.
If you have to regularly generate images using an AI-powered tool like Midjourney, you’re probably familiar with the challenges. Perhaps you ask it for an illustration of people at work, and it serves up solely Mad Men-era shots overladen with testosterone. Maybe you tell it to make you a bouquet without roses, and it gives you a flower quadrant worthy of Beauty and the Beast. During one particularly funny week at Every, we discovered that Midjourney’s ultimate Achilles heel was “person dreaming of piggybank.” The AI could not wrap its “head” around that concept, regardless of what details we fed it. (The results were nightmare fuel.)
I’ve spent a lot of time experimenting with Midjourney’s capabilities in recent months—I come from an advertising design background, so I’m particularly motivated to master the new medium. I waded through Midjourney’s detailed technical documentation, followed smart creators tweeting Midjourney tips, and stalked public channels in Midjourney’s Discord.
I learned that there are nearly infinite possibilities for directing Midjourney’s output. It’s incredibly powerful and adaptable, and you can exert much more control over the results than you’d think from just looking at Midjourney’s UI. It’s not an intuitive interface though—it takes research and practice to make full use of Midjourney’s command language (much like mastering keyboard shortcuts in your favorite apps).
At Every, we rely on Midjourney to generate our article images, so I pulled together a guide for our internal use. When we realized it might be a helpful resource for others, we decided to publish it for our subscribers.
In this article, I’ll walk you through the most powerful and useful techniques I’ve come across. We’ll cover:
- Getting started in Midjourney
- Understanding Midjourney’s quirks with interpreting prompts
- Customizing Midjourney’s image outputs after the fact
- Experimenting with a range of styles and content
- Uploading and combining images to make new ones via image injections
- Brainstorming art options with parameters like “chaos” and “weird”
- Finalizing your Midjourney output’s aspect ratio
And much more.
Are you ready to take your business to the next level?
AE Studio can help you achieve your goals faster than the competition with our custom software and AI solutions. We work closely with founders and executives to understand your needs and create a solution that is tailored to your success. Whether you need an MVP to test your idea, or a custom AI solution to drive innovation, AE can help.
We are the world's most effective team of developers, data scientists, and designers. We have a proven track record of success, and we are committed to helping you achieve your goals.
Schedule a free scoping session today to see how AE can help you transform your business.
Getting started (for beginners)
The most challenging part about using Midjourney is that there’s no official web app yet, and the whole front-end user experience happens through Discord. So the order of operations to get set up is a little convoluted, and you have to create your Midjourney images through Discord chatrooms (channels).
If you already have some basic familiarity with Midjourney and its UI, you may want to jump ahead to the “Promptwork” section. If you’re a beginner, follow Midjourney’s quick start instructions to get set up. Before you move on in this guide, just make sure:
- You’ve created a Discord account
- You’ve subscribed to Midjourney (there is no free trial anymore unfortunately)
- You’ve joined Midjourney’s Discord server
- You’ve joined a “newbies” channel in Midjourney’s Discord server
In whatever newbie channel you choose to join, you will see thousands of other people submitting prompts, and the images Midjourney generates for them. I learned a lot in the beginning just from studying other people’s approaches.
Private Midjourney access
If your company or community has its own Discord server, then you can add a Midjourney bot for internal use. That way, you can generate images without working in a cluttered, public newbies channel, and you can more easily peruse the images generated by your co-workers or direct community. (Note: Midjourney still reserves the right to serve up your images in other places, like their showcase page.) You can also enable Direct Messages with a Midjourney bot if you prefer to work privately (so only you can see them).
So, now that you’re all set up, how do you use Midjourney?
The magic happens with /imagine
To interact with Midjourney you must first type a Command in whatever Discord newbies channel you’ve joined. A Command refers to the action that you want Midjourney to perform. The most common one is /imagine followed by your text prompt telling Midjourney what kind of image to create.
/imagine <your text prompt>
You can be as specific or as vague as you want in your prompt. Then hit enter to see what the model cooks up. In less than a minute you should see a grid of 4 images that Midjourney sent back to you. Here’s an example you can try:
/imagine cute robot, white background
After getting the grid output you will see a few options beneath it.
- U → Upscale: Selects one of the four and makes it big / improves its resolution so you can use it.
- V → Variate: Generates variations from the selected output
- 🔄 → Rerun: Use this option if you you like to rerun the same prompt again and see more results
The options apply in a clockwise direction. So if you really like the top right image (2), then you would click U2. and get the upscaled version almost instantly. To download the upscaled image: click on it to open it to full size, and then right-click and choose save image.
Congratulations, now you know how to use Midjourney like 95% of its users. If you want to learn what the other 5% knows, keep reading.
So you generated an image, now what?
After an image is upscaled you are presented with a few options.
Variation:
The first row of buttons allows you to regenerate new options that can vary subtly or strongly from the original depending on what you are looking for. It’s an easy way to riff and brainstorm.
Zoom out:
The middle row of buttons allows you to zoom out from your output and generate additional visual context surrounding it. In other words, Midjourney will add more of the “background scene” behind the main subject in your image.
Panning:
The last row of buttons lets you expand your image as implied by the buttons, left, right, up and down. It generates more of the scene in a specific direction (the same way panning your camera would in the real world). This also gives your images new aspect ratios.
Promptwork: Where the magic happens
I usually recommend starting with a simple prompt so you understand how Midjourney interprets the concept. Your prompt can be a sentence, a word, a letter, or even just an emoji.
The fewer words you include, the more influence every word has on the output. It gives the language descending priority—so if you write a whole paragraph, the words and phrases at the start of the prompt will shape the output the most.
You don’t need to include explicit instructions like “make me an image” or “create an illustration.” Instead, get right to the point of describing the visual you want. For example:
The model then grabs each “token” you write (i.e., Elmo, skydiving, jungle) and compares them to its training data to generate the desired image.
Less specific prompts are great for experimenting and gathering unexpected results—it’s fun to see how the mysterious black box of AI interprets a prompt like “heartache” or “sustenance.”
More detailed prompts give you greater control over the end product. “Cooking pasta” will differ dramatically from “old Italian man making fettuccine, 1950s kitchen photography.” I usually take the “design squiggle” approach to image generation, coming up with a bunch of options via simple prompts in the beginning, then honing in on a particular approach by adding more detail.
Changing just one token in the prompt can reshape the image dramatically. Case in point: Banana Factory, Banana Machine, Banana Toy, and Banana Art.
Gettin’ picky with it (the prompts, that is)
You can experiment with a range of aesthetic and content variables to generate different kinds of images. Just remember that the more concepts you include, the more data that Midjourney has to consider when generating an output.
Some options:
- Subject: person, animal, character, location, object, etc.
- Medium: photograph, painting, illustration, sculpture, cartoon, doodle, tapestry, watercolor, 3D render, etc.
- Environment: indoors, outdoors, on the moon, in Narnia, underwater, the Emerald City, etc.
- Lighting: soft, ambient, overcast, neon, studio lights, warm, etc
- Color: vibrant, desaturated, muted, bright, monochromatic, colorful, black and white, pastel, etc.
- Atmosphere: foggy, sunny, misty, cold, dirty, etc.
- Mood: sedate, calm, dramatic, raucous, minimalist, energetic, etc.
- Composition: portrait, macro, scan, headshot, closeup, birds-eye view, etc.
- Style: Wes Anderson, minimalist, Van Gogh, Anime, Solarpunk, gothic, graffiti, medieval, etc..
To play with the look and feel of an image, add the phrase “in the style of” to your prompt, like “NYC in the style of stained glass” or “banana toy in the style of Andy Warhol.” The options are endless—you can channel styles of painting, cinematography, periods in history, and more. For inspiration check out this extensive list made by Metaroids.
Caption: Midjourney outputs for the prompt “NYC in the style of Pixar / Basquiat / stained glass.”
A common mistake: Midjourney doesn’t understand ‘no’
Midjourney isn’t always the most intuitive user experience. In some cases it understands natural language and can interpret your prompts the way a human would. In other situations, it’ll do the exact opposite of what you expect. As a result, you sometimes have to add technical instructions (called parameters) to your Midjourney prompt to receive the results you want.
For example, Midjourney can get confused if you tell it not to do something. Unlike Google or ChatGPT, it takes every token into account when generating its outputs. If you want to generate a flower arrangement without roses, you should NOT write:
/imagine flower arrangement without roses
Midjourney will see the token “roses” and likely deliver them. In order to solve this, Midjourney developed the no parameter:
--no
You can add this parameter followed by the tokens you would like Midjourney to try to avoid including in your output. So:
/imagine flower arrangement --no roses
Although this can be counterintuitive, you’ll find that parameters are worth the trouble to learn. They offer a lot more control over the end product. (We’ll cover parameters in more detail later in this post.)
Customize prompts and images after the fact with /remix
One of the most frustrating parts of using Midjourney is when it generates images that are *almost* what you need, but not quite. Luckily, there’s an easy hack called /remix for customizing results after the fact.
- Step 1: Turn on “remix” functionality by typing /remix into your Midjourney chat (where you’d normally type your /imagine command).
- Step 2: Generate image options using /imagine (as you normally would)
- Step 3: Pick the image you want to customize and upscale it (by clicking the appropriate U icon— “U1,” “U2,” etc).
- Step 4: Under the upscaled image, hit the “vary subtle” icon.
- Step 5: A “remix prompt” dialogue box will pop up, and you can change the prompt there.
The remixed image will be heavily influenced by the original, with the added customization from your new prompt.
Here’s a concrete example to help you wrap your head around the workflow. Let’s say I generated an image of a chicken chef. I liked one of the options, but I decided I wanted the chef to be a lizard instead. Once I upscale my chosen image, I press the Vary (Subtle) button and just replace the original prompt with lizard chef.
As you can see, this remix is very similar to the original chicken chef—the lighting, composition, layout, and warm colors have been preserved. The main difference is the appearance of the chef, who no longer looks like a bird and now looks like a reptile.
I always have /remix turned on because it allows me to get to my desired image faster. You only need to activate it once, and then it will be available for all future images you generate (until you disable it).
Permutations
One useful way to iterate fast in Midjourney is to use permutations, which allow you to run multiple related queries from a single /imagine command. To do so, include your chosen word variations within {curly braces} in your prompt.
For example, I could generate my previously mentioned two-word banana images in a more streamlined way by typing:
That single prompt kick-started four individual image searches. This is super useful when you have many different ideas of where the prompt could go but don’t want to waste time plugging in separate prompts.
Moving beyond the blank slate
Ok, now that you have some of the basics of promptwork down, let’s get into more advanced techniques for generating options. It’s hard to work from a blank slate in the creative process, so visual designers often start by creating mood boards, gathering inspiration from the world at large, and riffing on many variations of a concept.
This type of brainstorming is even easier to do with Midjourney, and it’s one of the most exciting aspects of the technology—it allows me to 10x the breadth of ideation.
Image injections
Image injections are a powerful brainstorm tool in Midjourney. If you find a reference image online that’s similar to what you’re going for visually, you can upload it to steer the model in a certain direction. Then, you can ask the AI to make specific changes or experiment in broader strokes.
To do so, grab the URL of the image and paste it into your Midjourney prompt, followed by text telling Midjourney how to alter the image. (Note: image links always go at the front of the prompt.)
This allows Midjourney to compare the image in your prompt to its training set and produce an output that emulates the same style. You can use as many image links as you like.
For the following example, let’s keep it simple. I want to recreate the photography style and angle in the Nike ad below, but substitute a child as the subject instead. I paste the image’s URL followed by the word “child” in my Midjourney prompt:
It's not an exact translation of the original, but it’s pretty close.
What is even cooler about this is that each image that Midjourney generates also has its own new unique link URL, upon which you can use to further iterate. Let’s say I want to tweak the new image. I repeat the process from above except this time:
- I swap the original source image URL (the Nike ad) with the URL of the Midjourney output (the child).
- Then I can switch the text prompt to: child wearing sunglasses
As you can see, Midjourney created a similar image as before, plus added the tokens wearing sunglasses. It’s worth noting though that it altered the subject slightly-the sneakers, outfit, hair, and other characteristics are a little different.
/blend
Blending is another cool command that allows you to combine the content and style of multiple images. This is the same as using multiple image injections at the same time. The main difference is that you can’t include text prompts in image blending (and you upload the image file instead of pasting its URL). When you type the command /blend, you get the option to upload up to five images:
By combining two, three, four ,or up to five very different images, you can generate a totally new and novel image. It’s awesome for experimentation. We can grab our chicken and our Italian chef cooking pasta and blend them to create this weird chicken chef (who you may recognize from earlier).
/describe
What if you don’t know how to accurately describe what you want and all you have are visual references? Fret not: if you type the command /describe, Midjourney allows you to upload an image, and it will generate four visual descriptions rich in detail.
You can then use these as your prompts to direct Midjourney to create a specific type of output. For example, by uploading the chicken-man image with the /describe command, I get these four different interpretations of it.
I can then plug these into /imagine to see what Midjourney comes up with next—an ouroboros of creativity. This is great when you are in need of tokens that can help you achieve specific results.
Parameters
Now that you understand how image injections work in Midjourney, let’s dive deeper into parameters. Like the --no parameter we covered earlier, these are specific commands that give you more control over Midjourney’s outputs.
In the simplest of terms, you can think of parameters as controlling Midjourney’s settings. They can modify specific details like an image's aspect ratio, but they can also help you brainstorm and generate new ideas. As you’ll see below, you enable them through unique snippets of code or text (many of which rely on number ranges).
There are a lot of different parameters available, but I’m going to focus on the more interesting and useful ones. For a complete list, check out the Midjourney docs. You can use multiple parameters in one prompt; they always go at the end of the prompt, after the text portion of your prompt and the image injection.
Image weight
This parameter allows you fine-grained control over how much weight Midjourney assigns to your image injection compared to the text in your prompt. For example, let’s say you want to combine an image of a sunflower and a prompt like PC computer. I can play with different weights by adding this parameter snippet to a text prompt:
--iw <0–2>
Midjourney’s default value is 1. If I set the parameter at less than 1 (as seen below) the sunflower plays a less prominent role in Midjourney’s output. If I set the parameter at greater than 1, the sunflower starts to dominate the PC computer.
As you can see, the higher the weight the more importance Midjourney assigns to the image versus the text prompt. The PC computer starts losing its prominence against the sunflower as the weight moves up. This is incredibly useful when iterating and refining your output in your desired direction.
Chaos
When generating images, you will notice that the four images inside of the initial grid output will be very similar. If you want to add more diversity to your grid, use the chaos parameter:
--c <0-100>
The greater the chaos value, the more unusual and unexpected the results and compositions will be. Lower values produce more consistent and reproducible results.
Remember the cute robots we generated earlier? They all looked relatively similar. If I wanted to see more unexpected options, I can just use the same prompt and add the chaos parameter. The second grid has a lot more cute robot diversity.
Weird
The “weird” parameter lets you introduce more unexpected and quirky aesthetics to your results:
--w <0-3000>
The values go from 0 to 3000, with 0 being the default. Look how much difference there is when prompting “chicken” with different levels of weirdness.
Aspect ratio
One of the most useful parameters allows you to change the aspect ratio of an image output. By default, Midjourney outputs have a 1:1 square ratio, as demonstrated in all previous examples. In order to change this, type:
--ar <aspect ratio>
For example, if I wanted a mobile-friendly image, I would choose a vertical ratio, so my parameter would look like --ar 9:16, and so on. If I’m making design assets for both mobile and desktop, this parameter is extremely useful.
Version
As Midjourney gets better, its team releases newer models. The default, newest, and most capable model is 5.2. In order to use different Midjourney models when generating your image, write:
--v <1, 2, 3, 4, 5, 5.1, 5.2>
You can see how different Midjourney models interpret the token “Monalisa.” Version 5 is by far the best model for achieving realism. However, I like to experiment with a range of model numbers as an easy way to generate diversity in my design options.
Adding parameters to pre-existing Midjourney images
As we previously learned, we can iterate on our results, so if we wanted to change the aspect ratio of a Midjourney image we already created, we can do so. Take the image of the child wearing sunglasses. Paste the Midjourney URL generated for that image earlier alongside the aspect ratio parameter:
Seed
The seed parameter is a little too advanced to get into here, but as a quick overview: it helps you keep consistency in your Midjourney images when you’re rerunning prompts but adjusting parameters. Otherwise, Midjourney may generate a unique image every time you try to add parameters to your prompt. That’s obviously frustrating if you like the original image it created and you just want to tweak the aspect ratio or something like that.
Read more about using the seed parameter here.
Combining multiple parameters
You can combine different types of parameters to shape an output. Just put them all at the end of the prompt. I recommend using parameters only after you see potential in one of your outputs, and want to iterate and polish.
For example, let's say I’m looking to make myself a new desktop background for my computer and I really liked the banana art. In order to get the right aspect ratio for an image Midjourney already made, I would first add the unique Midjourney URL created for the banana art earlier, and then add some parameters to tweak it. My prompt could look something like this:
Sample workflow
There is no right or wrong way to use Midjourney. Like coding, writing, or painting, you can achieve the same objective through an infinite array of ways. There is no specific order you must follow when generating images through Midjourney.
The workflow I’m describing below is what works best for me, so feel free to use it as a starting point for inspiration. By understanding the principles behind basic prompt work, commands, and parameters, you should be equipped to develop the process that best suits you.
Lucas’s workflow:
Step 1: Brainstorm different ideas I can represent visually. I start with a basic prompt to see how Midjourney understands my chosen tokens.
Step 2: Keep tweaking the prompt to generate new options until I find an output that looks promising.
Step 3: Depending on how far I am from being satisfied with the output, I remix the prompt, make variations, blend, incorporate image injections, and play with parameters.
Step 4: Upscale the image I like best.
For example, for our recently published piece about how builders think, I was tasked with making the cover image. As a team we knew we wanted to portray a woman building a rocketship in watercolor style so that’s exactly what I typed in my prompt (step 1). After shuffling through a few grids I found two images I liked as a starting point (step 2).
After a few rounds of blending my images and playing with the --version parameter, my results improved (step 3). Finally I landed on a grid that looked amazing, and I upscaled it into the image at the top of the article (step 4).
Fun final tips
Faces (famous people and yourself)
Midjourney is only as good as its training data, meaning it will be very good at creating images of famous people like celebrities and public figures because they have a large facial footprint online. (That’s how we got the Pope wearing a white puffer jacket.)
In the example below, we can see the level of photorealism and accuracy that Midjourney is capable of. By using the Vary (Subtle) button while having the /remix command activated, we can easily do some face-swapping that looks natural without altering much of the rest of the image like the outfit, composition, lighting, and background.
However, what if I wanted to generate an image of myself? I’m not famous, and if you search for images under my name, you will most likely encounter other more famous Lucas Crespos. So how can we work around this?
There are a few ways to do this, but my method of preference is image injections. If I wanted to generate images with my likeness, all I would have to do is inject a few selfies into the prompt and then write whatever I want Midjourney to turn me into. Midjourney’s training data doesn’t include me, but my prompt can. As you can see in my self-example below, Midjourney takes my selfie and uses it to generate new images in whatever style I can imagine. These new outputs aren’t 100% me, but if I wanted I could keep iterating and remixing until I get something closer.
Learn from other Midjourney users
If you are trying to generate something simple, it’s probably been generated by one of the millions of Midjourney users out there. In order to browse across all creations, go to the Midjourney showcase page. You can search for what you are looking for and see what others have been able to generate.
For example, these are a bunch of different chicken chefs generated by other Midjourney users. If you see something that you like and/or would like to emulate, you can copy and paste the prompt they used.
The guide above is only the tip of the iceberg of what is possible in Midjourney. I encourage you to read the Midjourney docs for a more detailed guide on interacting with the platform.
From my point of view, Midjourney is more limited by our own imagination than by its current capabilities—so play with it, and let yourself get lost in its sea of infinite potential. Remember that Midjourney is great for creating realistic-looking images, but you can also use it to imagine things never seen before. This is a mighty powerful tool for creativity, and it’s only going to get better with time.
Lucas Crespo is a brand strategist and designer with a background in creative advertising. He currently spends most of his time helping with sales, design and operations at Every as well as managing and scaling his agency VeryVisual. Before that, he was an Art Director at VMLY&R, Wasserman, McCann and BBDO doing work for brands like Chase Bank, Cerveza Modelo, and Snickers among others. You can find him on Twitter or through his website.
Ideas and Apps to
Thrive in the AI Age
The essential toolkit for those shaping the future
"This might be the best value you
can get from an AI subscription."
- Jay S.
Join 100,000+ leaders, builders, and innovators

Email address
Already have an account? Sign in
What is included in a subscription?
Daily insights from AI pioneers + early access to powerful AI tools